
ORGANIZING & SORTING
|
CULLING - in photography refers to the process of selecting and removing unwanted or low-quality photos from a larger set of images. Involves reviewing the images one by one and making decisions based on factors such as technical quality, composition, and overall artistic merit. |
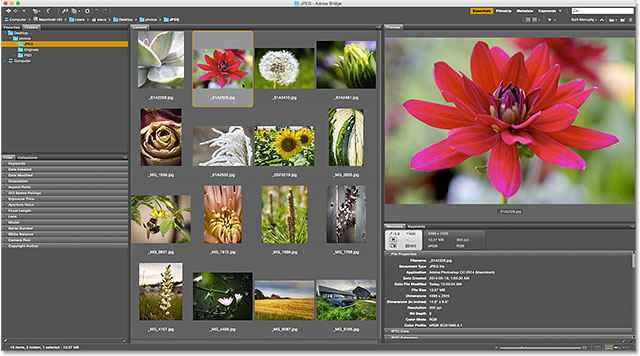
Creating an organized workflow for culling and sorting photographs in Adobe Bridge is essential for efficient photo management. Here are 5 important steps to include in your workflow chart:
1. **Import and Review**: Begin by importing your photos into Adobe Bridge. As you import, take a quick initial look at each image to get an overview of your shots. Use the "Review Mode" (Spacebar key) to quickly cycle through your images and mark those that you want to keep.
2. **Rating and Labeling**: Use the rating and labeling system in Adobe Bridge to further classify your images. Assign star ratings (1 to 5 stars) based on image quality and labeling (e.g., "Selects," "Rejects," "To Edit") to help identify the best images and filter out the ones you don't need.
3. **Keywords and Metadata**: Add descriptive keywords and metadata to your images. This step is crucial for efficient searching and organizing. Keywords should reflect the content, location, and any other relevant information about each photo.
4. **Collections and Folders**: Create collections or folders to organize your images logically. Collections are virtual groupings that allow you to categorize photos without physically moving them on your storage device. Folders, on the other hand, represent the physical file structure on your storage.
5. **Batch Renaming**: Consider renaming your files for better organization. You can use batch renaming tools in Adobe Bridge to give your images more meaningful and consistent names, making them easier to find later.
By following these steps in your Adobe Bridge workflow, you can efficiently cull, sort, and organize your photographs, making it easier to locate and work with your images in the future.
